Working with Commercial Quote Manager
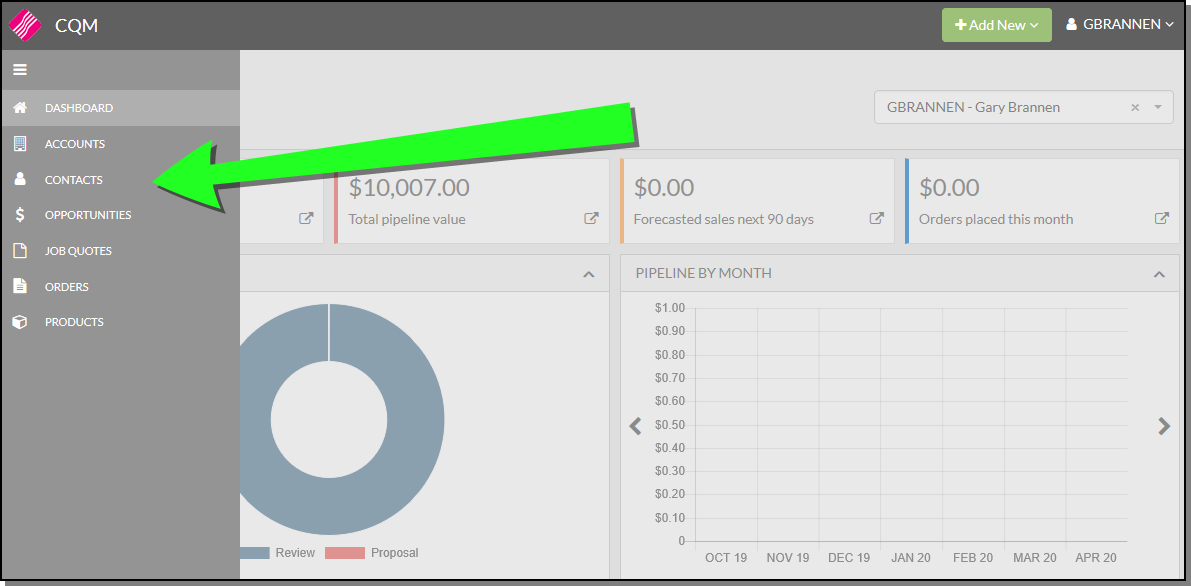
Use the links on the left hand side of the application to add/edit Accounts, Contacts, Opportunities, Job Quotes, Orders and Products.
Dashboard
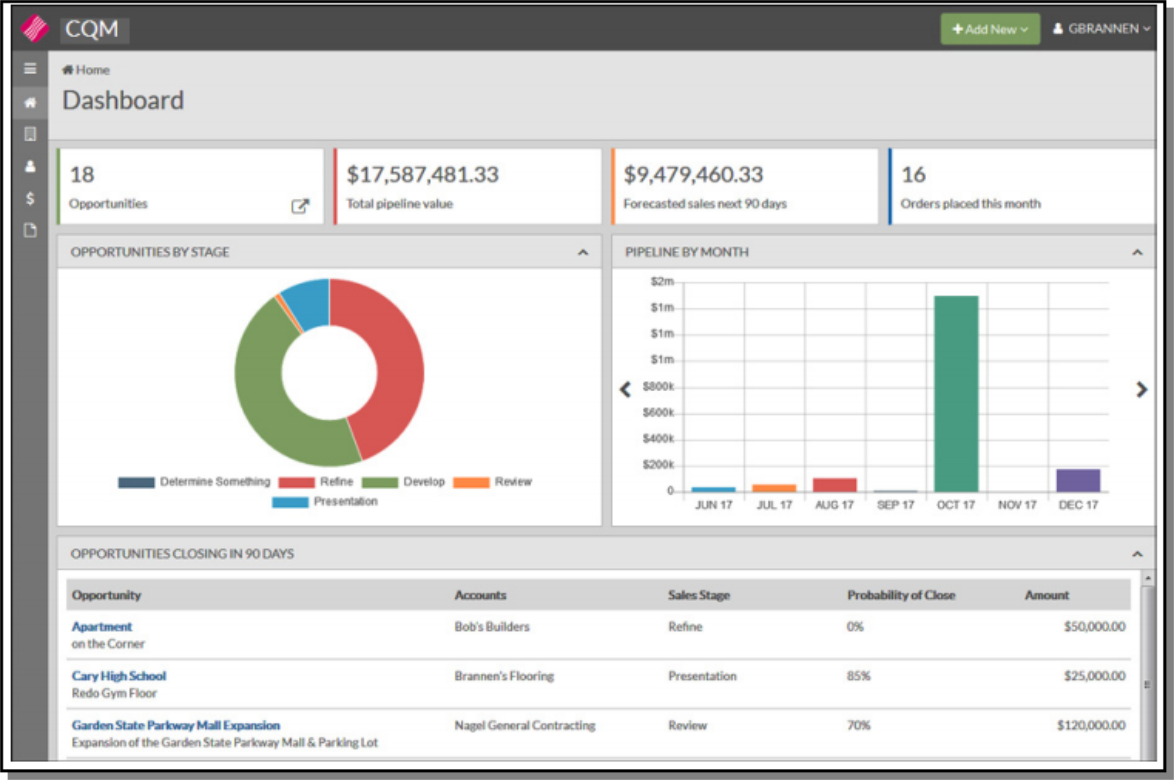
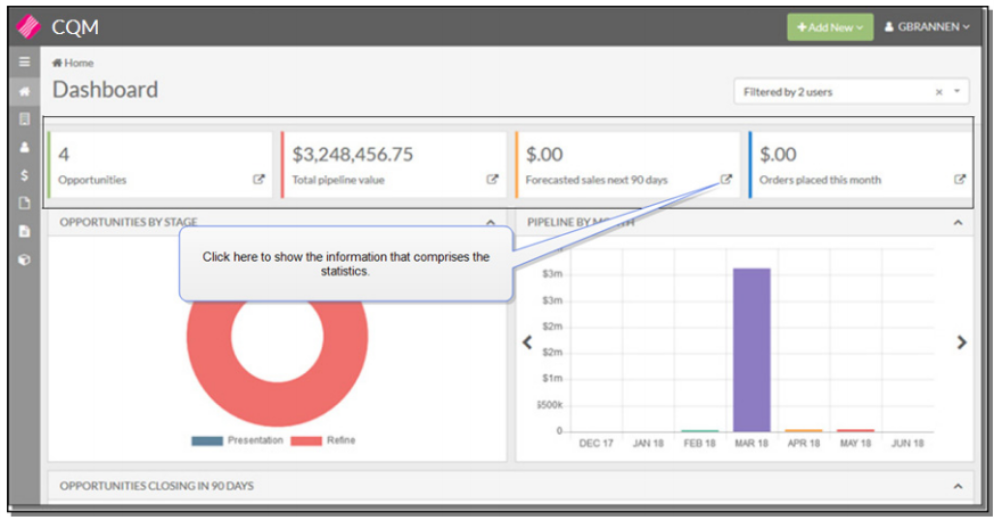
The dashboard, which is the first window displayed, shows your Opportunities by Stage, Monthly Pipeline, and Upcoming Opportunities.
| Setting | Description |
| Opportunities Count | Count of all open Opportunities (based on status defined in the Admin screen) |
| Total pipeline value | This is the sum of the Est. Amount value on all open Opportunities. Clicking on this box opens a filtered view of the Opportunities screen where only the open opportunities are displayed. |
| Forecasted | This is the sum of the Estimated Amount value on all open Opportunities where the Est. Close Date is less than or equal to 90 days. Clicking on this box opens a filtered view of the Opportunities screen where only the open opportunities that make up this data set are displayed. |
| Order Placed this Month | Total dollar amount of all Orders that were created from opportunities so far in the current month. |
| Opportunities by Stages | This chart shows a count of opportunities by status. Only open Opportunities are to be included. This matches the Opportunities Count value. |
| Pipeline by Month |
Group open Opportunities by month using the Est. Close Date, then sum the Est. Amount values. Display the totals by month as shown here. There are forward and backward arrows that are to allow the user to cycle through future and past months. When entering the screen the first month to display on the left is the current month. Show seven months' worth of data. |
| OPPORTUNITIES CLOSING IN 90 DAYS | List of Open Opportunities to which the user has access to view and have an estimated close date 90 days out. This data set is comprised of Opportunities that make up the Forecasted sales next 90 days value. |
Dashboard Select User View and Widget Filters
If a user has All Access they can select and view data for all CQM users.
If a user has Team Access they can select and view data for the members on their team...
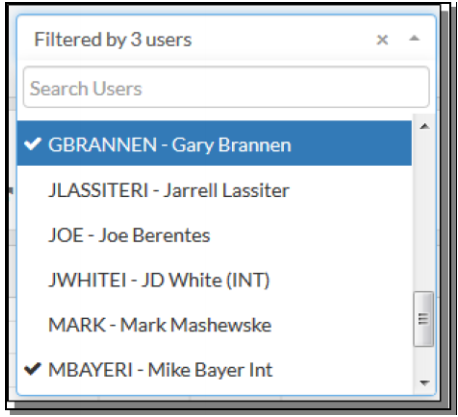
...to see their statistics.
Accounts
Use the Accounts view to display and edit existing accounts and add new ones.
Details
Click on an account to access its details.
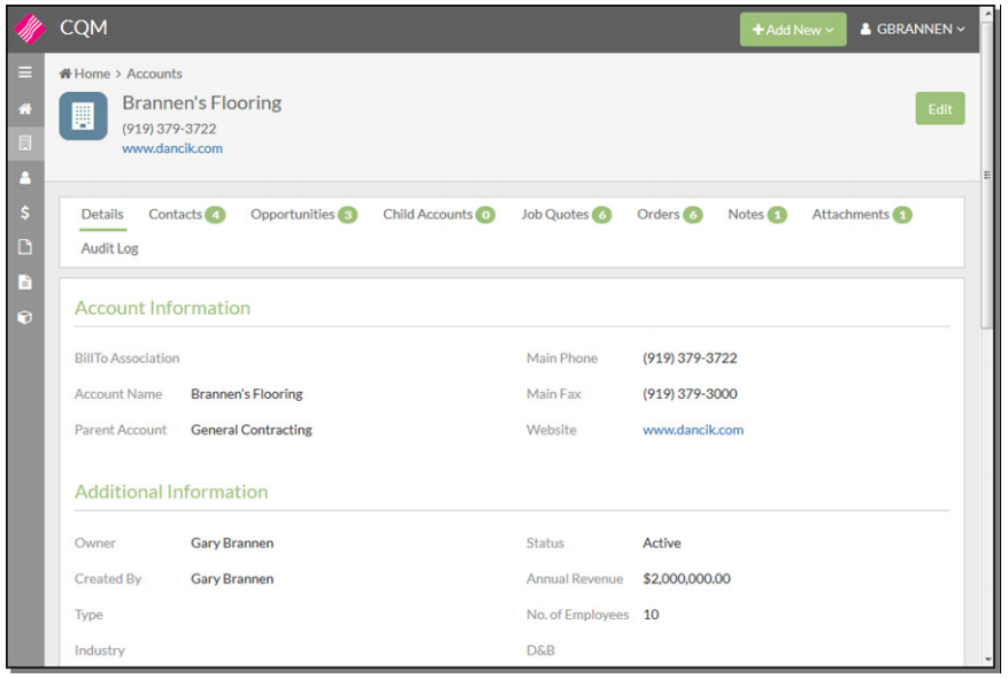
Use the optional Parent Account setting to set up a hierarchy of Accounts. An example of how this setting can be used is for multiple chain stores that have one parent account. Accounts assigned to a Parent Account are considered Associated with the Parent account and display when Associated Accounts is selected.
The Billto Association allows you to tie the account to a billto file. This association can serve as a buying account for quotes.
Enter the account’s Dun and Bradstreet number, if applicable, in the D&B setting. You can use the D&B number and the Dun and Bradstreet service to access commercial data to businesses on credit history, business-to-business sales and marketing, counter party risk exposure, supply chain management, lead scoring and social identity matching.
Contacts
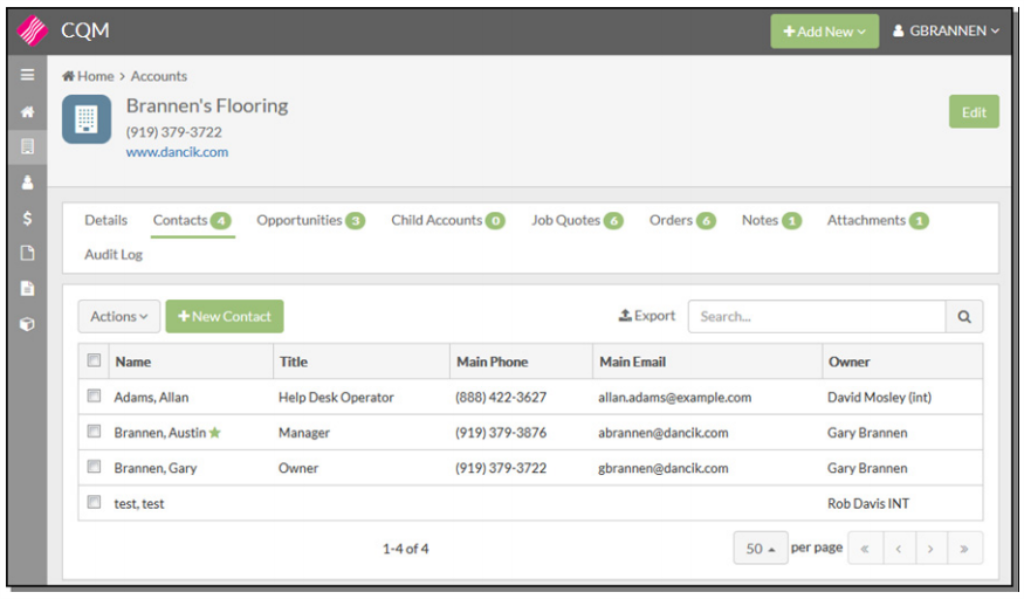
To add a new contact to the account, click New Contact. This brings up the Contacts window.
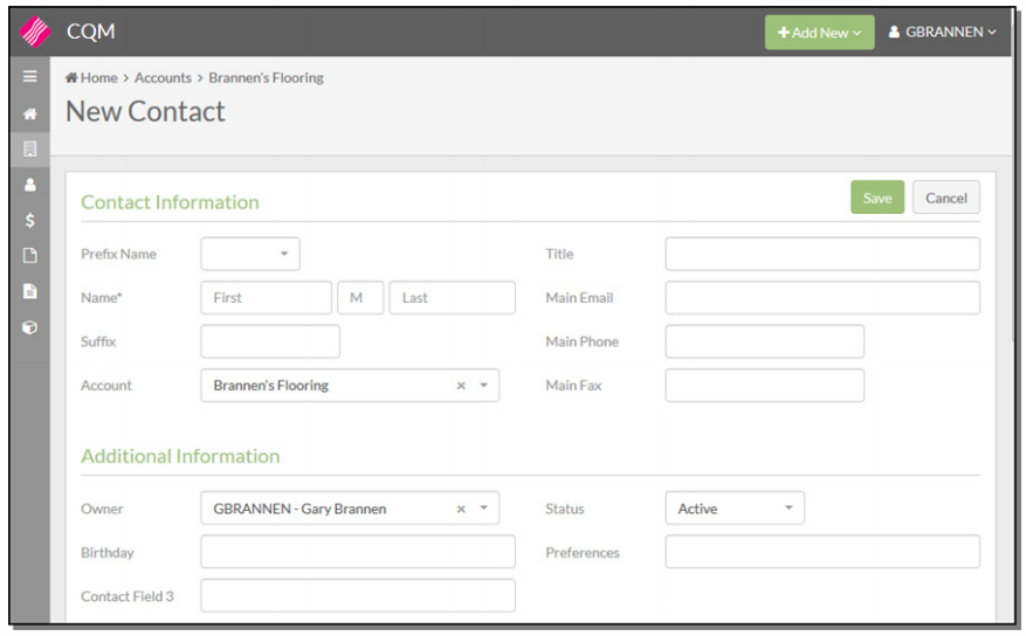
Add the necessary contact information and click Save to add the contact to the account.
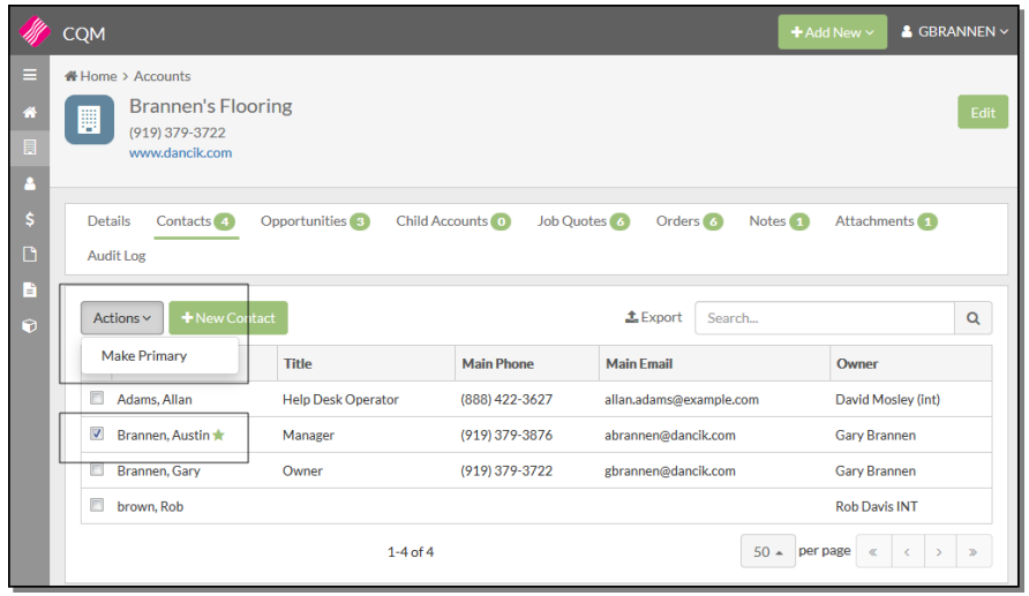
Assign one of the contacts as the primary contact for the account.
Opportunities
Use this part of CQM to enter and track potential sales assigned to the account.
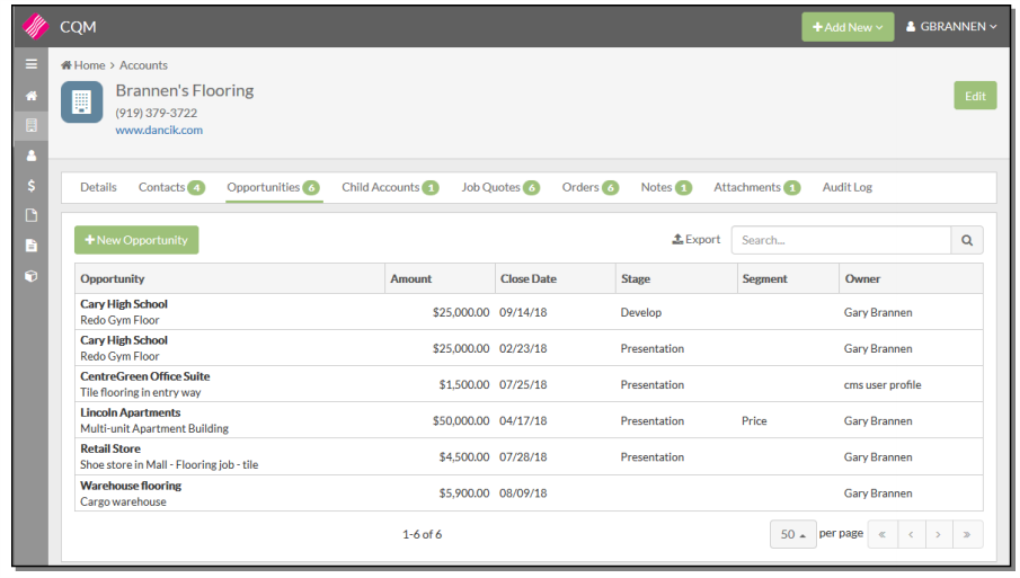
Click New Opportunity to open up the New Opportunity window.
Add information as needed.
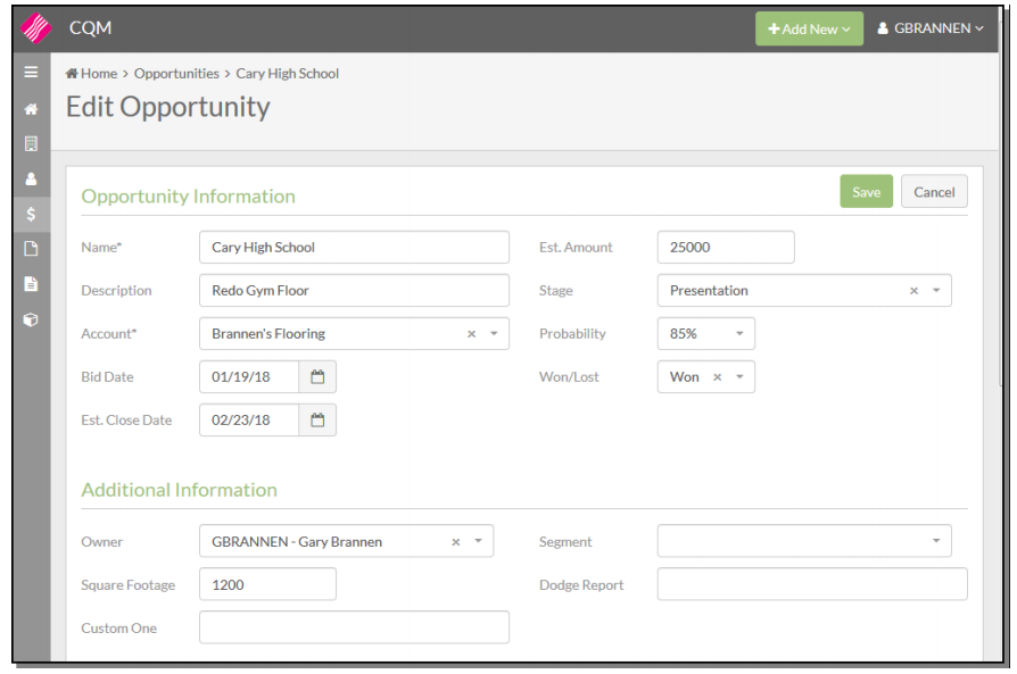
The Sales Stage and Probability settings are linked via the Sales settings in the Opportunities section of the Admin panel, but they can be changed as needed.
Enter the Dodge Report information (Name and/or number). The Dodge Report is a comprehensive listing of Who, What, Where, When, How and How Much for a construction project.
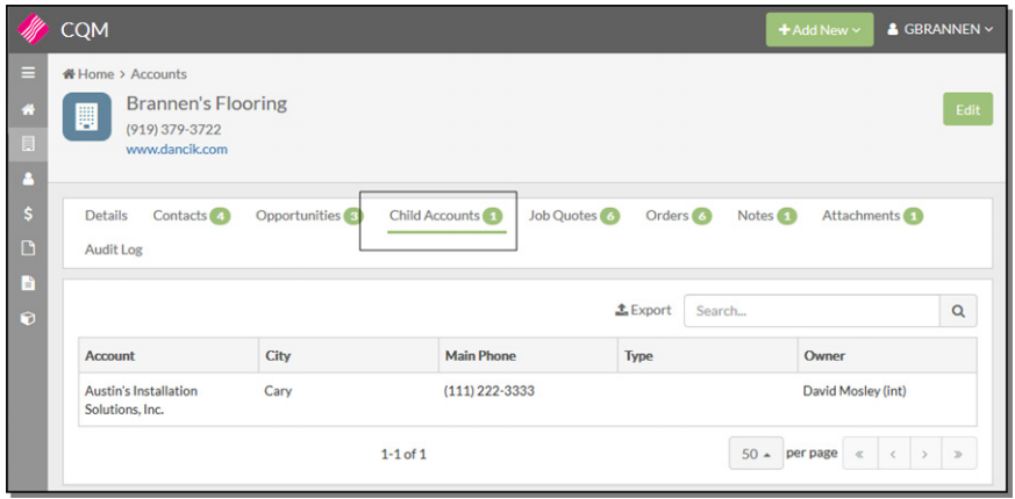
Child Accounts
These are accounts that share a Parent/Child relationship; as set up in the Account Detail window.
The accounts displayed are set up as child accounts to the active account (in this example Brannen Flooring).
Job Quotes
These are the job quotes specific to this account.
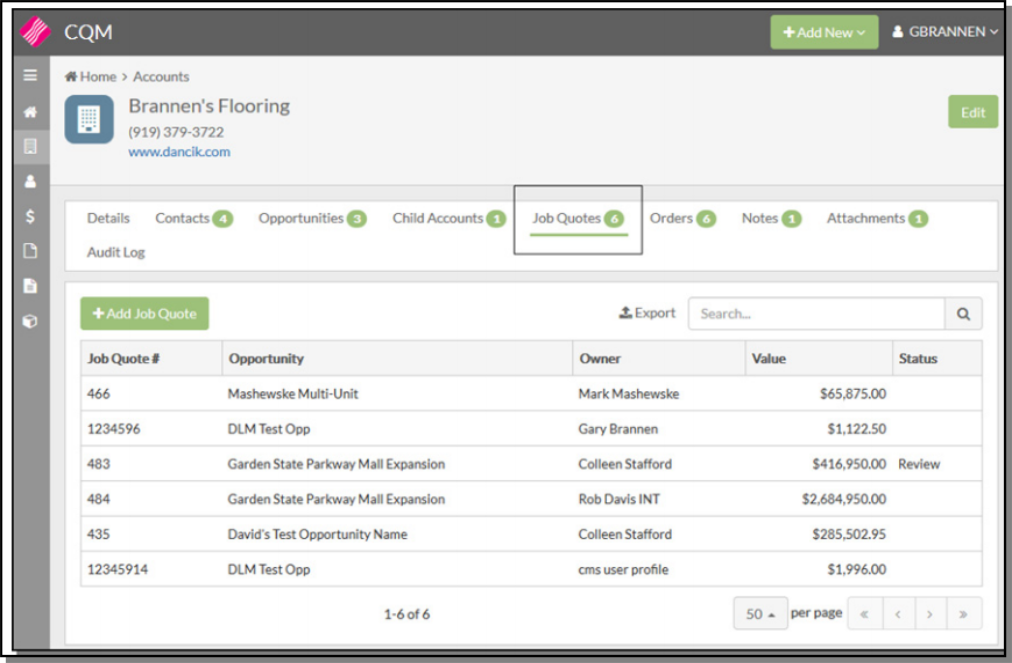
To add a new entry, click Add New in the upper right hand corner and select Job Quote.

The New Job Quote window appears. Enter the information as necessary.
Use the Opportunity drop down menu to select an opportunity associated with the job quote. When an opportunity is selected its corresponding values populate the window.
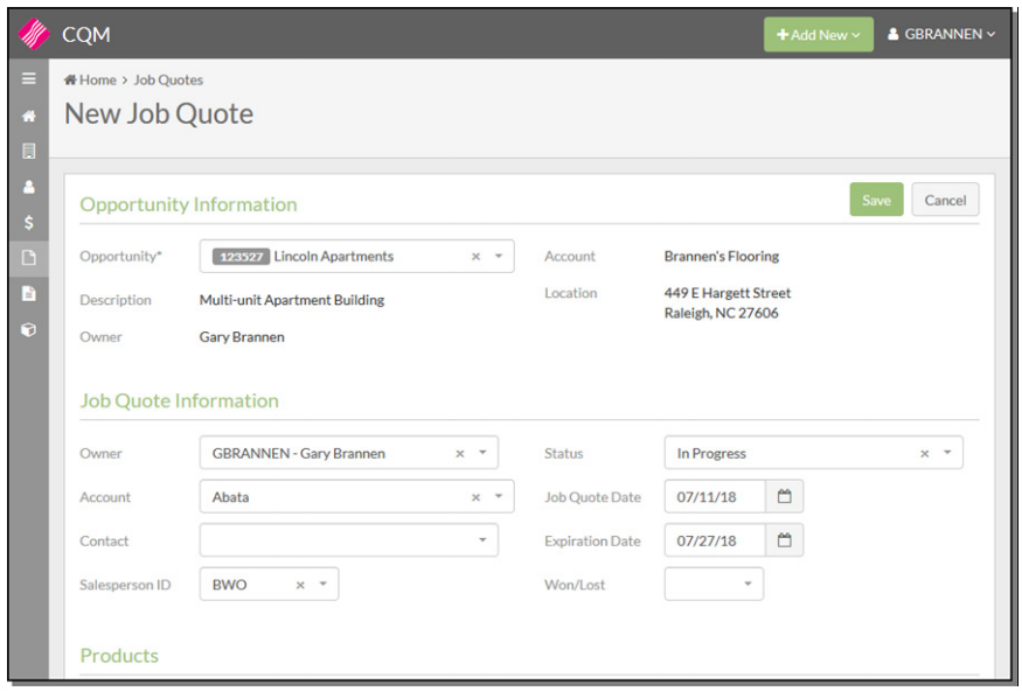
Click Save to create the Job Quote.

- Click Distribute to view the job quote in a preview screen and distribute it via email.
- Click Copy to create a new Job Quote with all the same values except the Account and Contact information. Those will need to be reentered on the new quote.
Orders
This part of the application displays the orders, processed and unprocessed, created from the Job Quotes associated with this account.
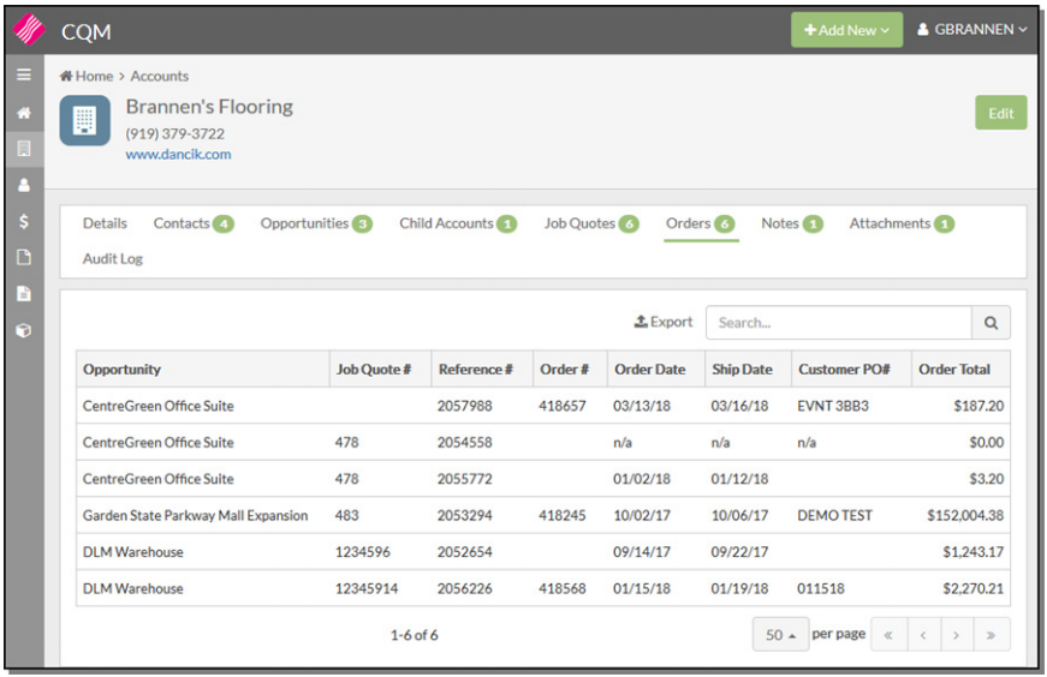
CQM accounts are associated with Billto accounts via the Billto Association setting under the Additional Information heading on the Account Creation window.
Notes and Attachments
These tabs allows you to create notes for the entry and to add additional files.
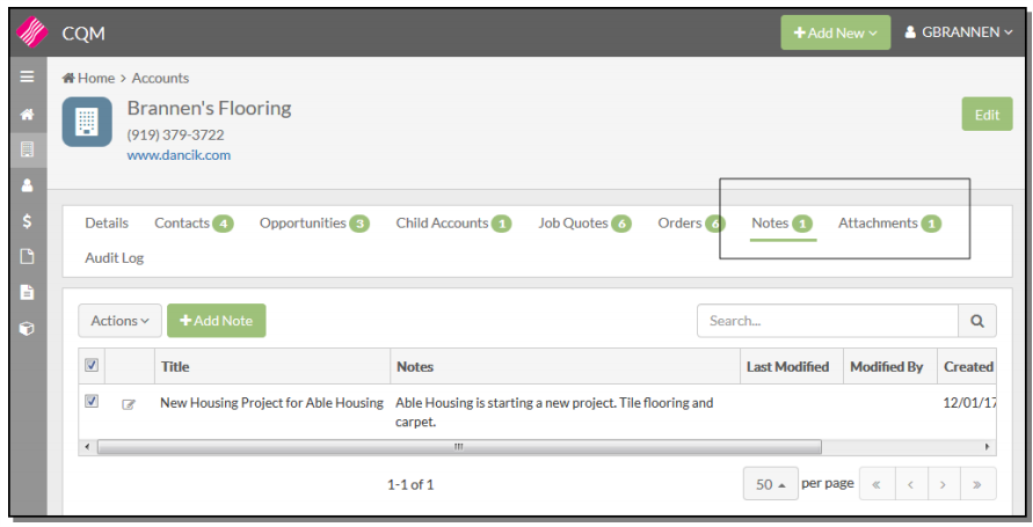
Add Notes and/or Attachments as needed.
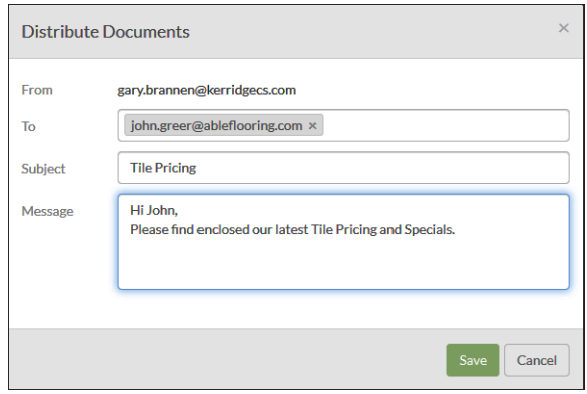
Use the Actions button to distribute attached Files. Notes cannot be distributed.
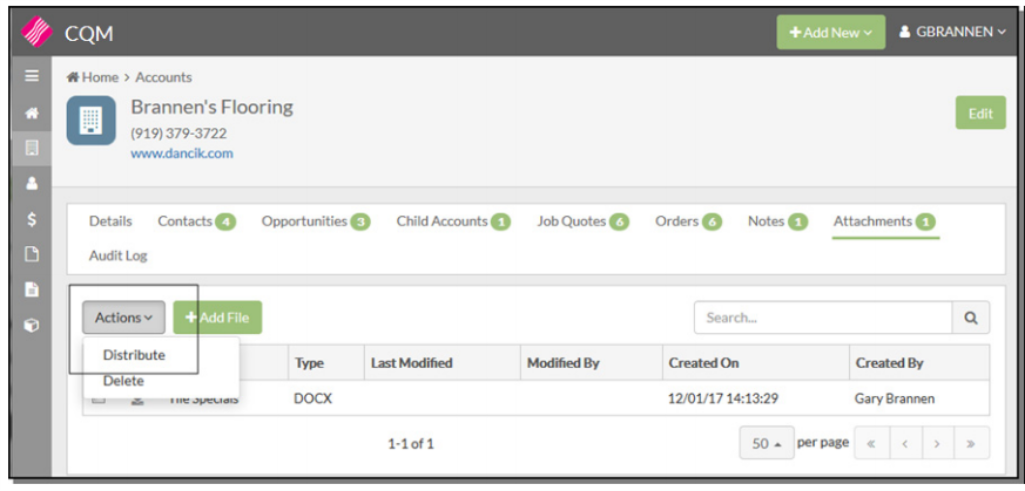
The From email address is defaulted in from the Account.
Audit Log
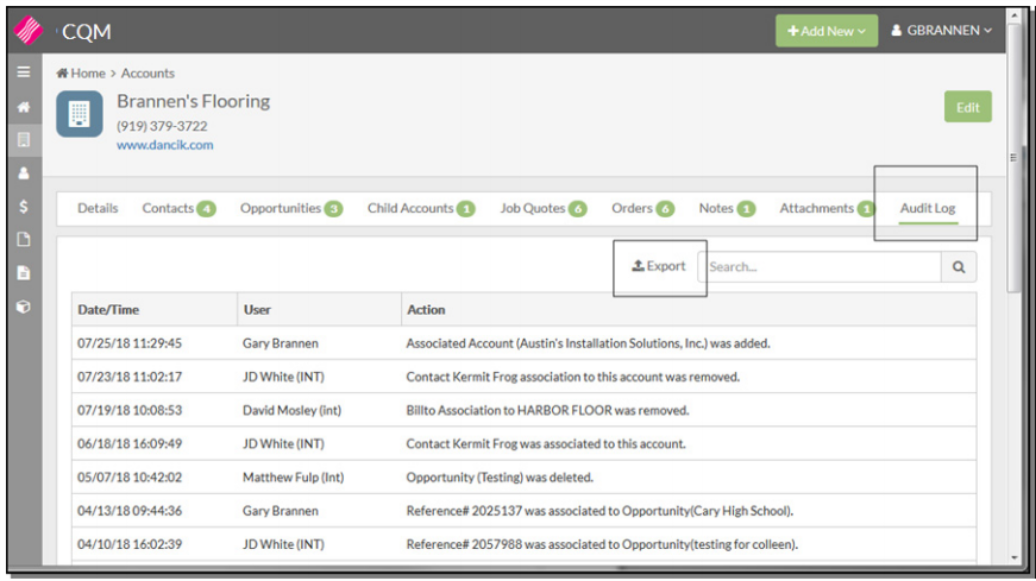
An Audit log is included in all the sections (Accounts, Opportunities, Contacts and Job Quotes) of the CQM. This Audit Log records when an entry is added, changed or removed.
Click Export to save the audit log as a .CSV file.
Actions
The Actions allow you to update several records at the same time.
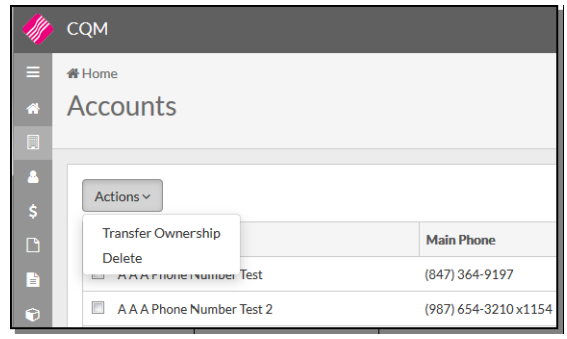
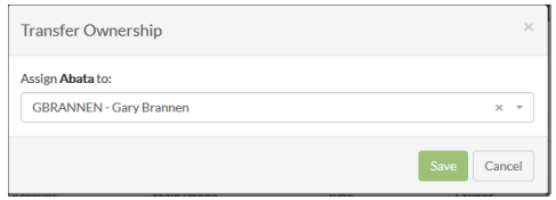
Transfer Ownership - This functionality allows a user to update the owner assigned to an account, from within a single contact view without entering into edit mode.
Select an account to transfer and click Transfer Ownership.
Use the dropdown menu to display a list of all CQM accounts.
Delete - This action can only be performed on Accounts that do not have associations to other records; such as Opportunities.
Contacts
This is where you can add information and details about the people associated with the Accounts and Opportunities.
- Click the Contacts link on the left hand side of the window to display all the existing contacts.
- Click on a contact to access it’s details.
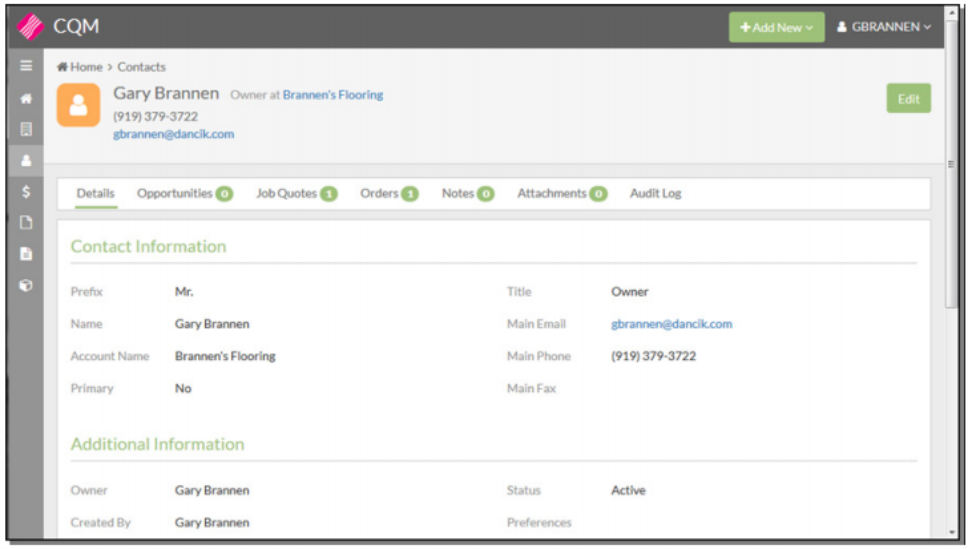
From the Contact Details window, shown above, you can:
- Edit the contact’s detail information.
- Click Add New to add a new contact via the +Add New button in the upper right hand corner.
- View the Opportunities, Job Quotes and Orders where the contact is listed.
Actions
The Actions allow you to update several Contact records at the same time.
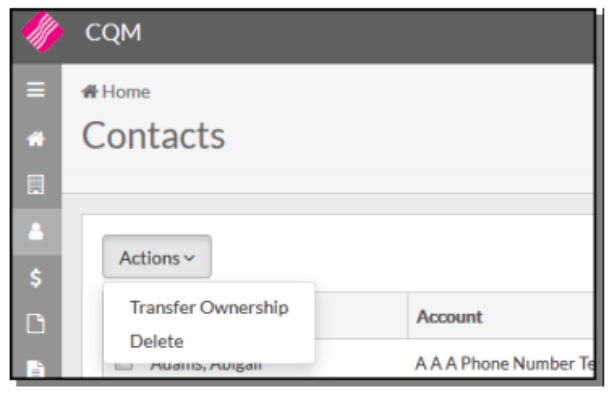
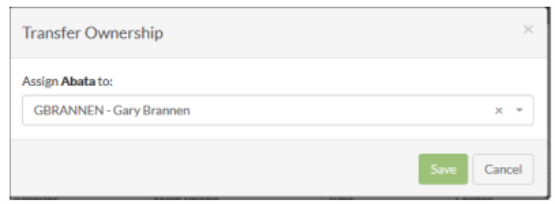
Transfer Ownership - This functionality allows a user to update the owner assigned to a contact, from within a single contact view without entering into edit mode.
- Select an account to transfer and click Transfer Ownership.
- Use the dropdown menu to display a list of all CQM accounts.
Delete - This action can only be performed on Accounts that do not have associations to other records; such as Opportunities.
Opportunities
This part of CQM allows you to add new Opportunities or edit existing ones.
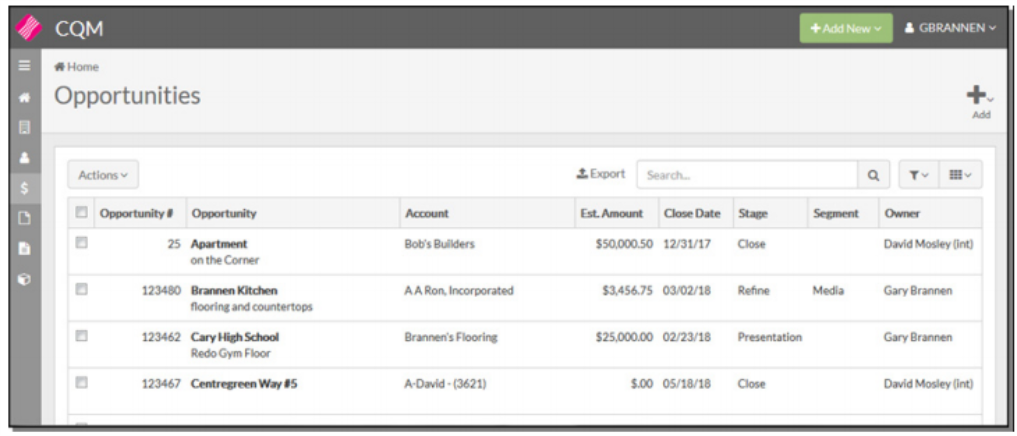
Click Add New in the upper right-hand corner to add a new record.
To edit an existing opportunity, click it and then click the Edit button in the right hand corner.
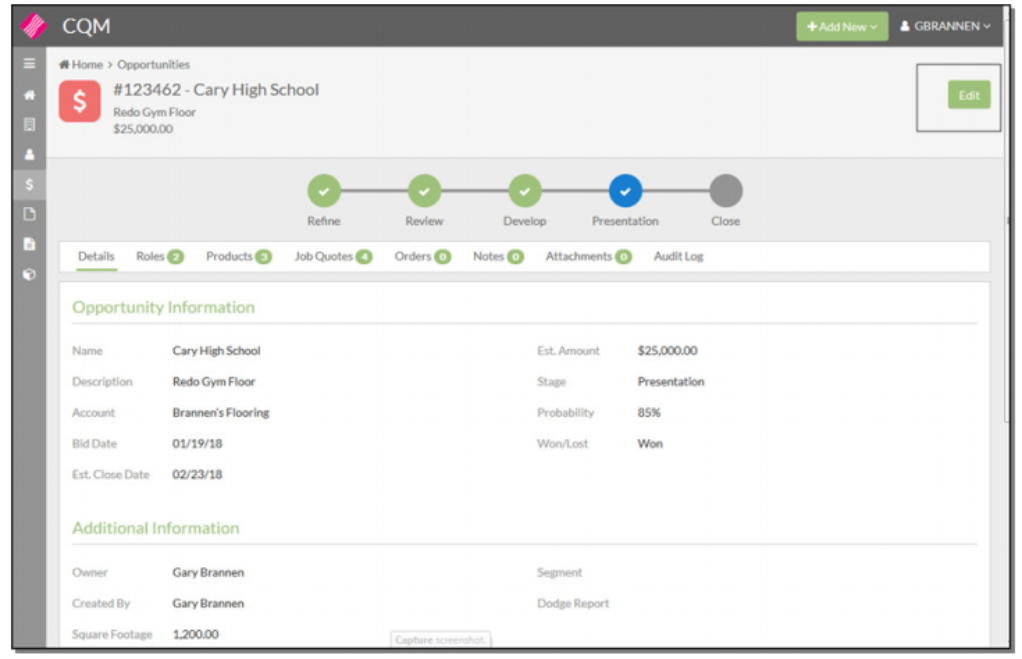
Update the information as needed.
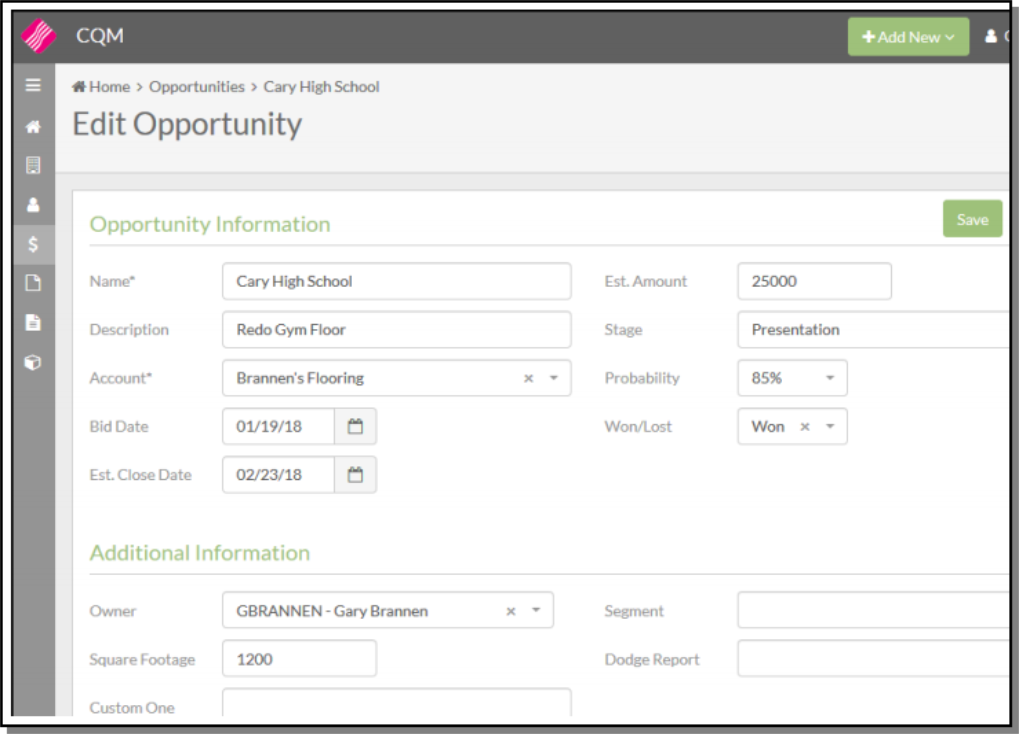
Click Save to retain any changes and to return to the main opportunities window.
Roles
Roles can be added by Account or Contact. The choices in the Account / Contact drop down vary depending on the role is attached to an account or contact.
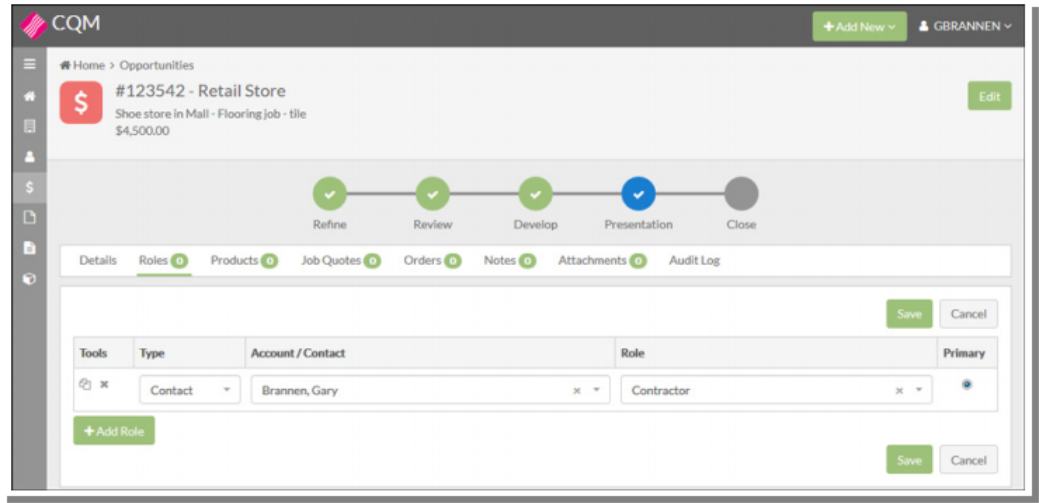
The options displayed in the Role drop down can be added to or edited from the Opportunities portion of the Admin Panel.
Assign one of the Role entries as the Primary for the Opportunity.
Products
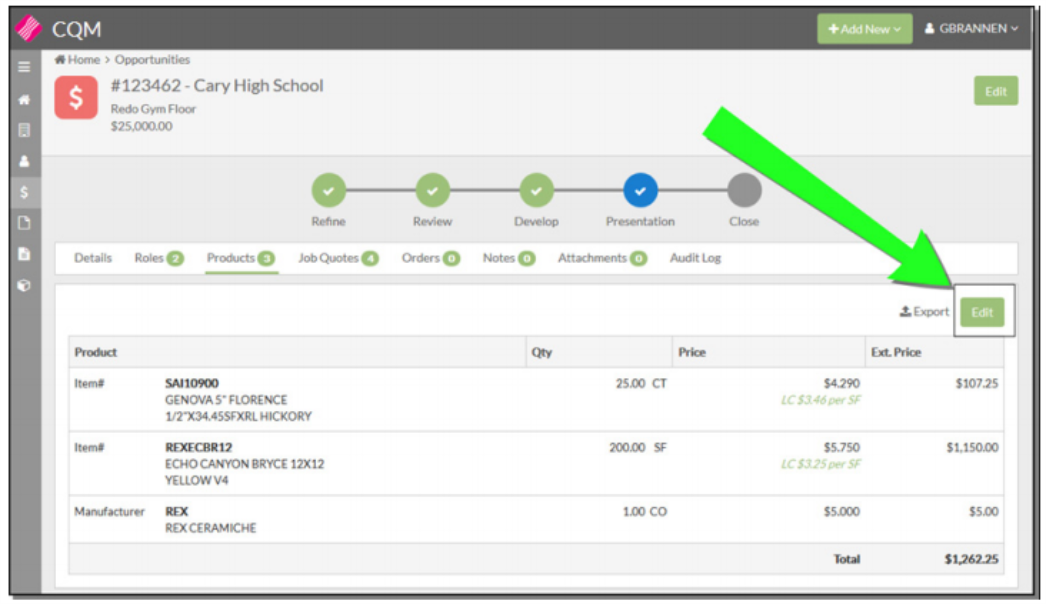
The Products tab allows you to search on and then add items.
Click Edit, to add new entries.
On the window that appears, click Add Product.
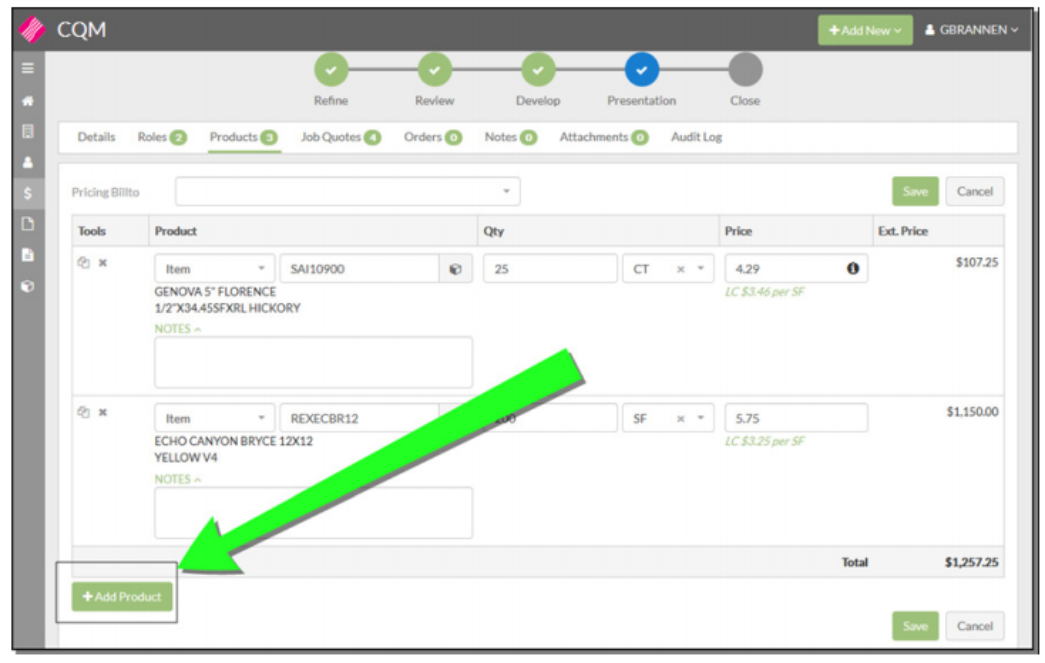
Select one of the following Product Types from the drop down.
- Manufacturer
- Item
- Price Class
- Product Line
Notes:
- Selecting Product Type Item or Price class will return the Native Unit of Measure and List Price for the value entered.
- When the Pricing BillTo option is enabled in the Admin panel this dropdown is displayed. Selecting a billto controls the Pricing returned when Product Type Item is used. Instead of returning List Price it will returning pricing based pricing expectations defined for that account.
- The Pricing BillTo option does not apply to Product Type Price Class. It will continue to return the list price value.
- When a Price for Product Type Item is manually changed an information icon will appear in the Price field. Hovering over that icon will display a tool tip containing the original BillTo, Price, and UM that were returned.
- If the BillTo Pricing value is changed a popup displays asking the user if they want to update all existing pricing to the new billto value or leave the pricing in its current state. If they chose to update to the new billto all unit of measure and Pricing for Product Type Item will be updated to reflect the new BillTo. If they chose not to update then all existing Product Type Items will remain the same.
The Product Type selected determines what can be entered into the Value setting.
If you are working with Items, the UOM and Price is imported in from the Item File.
Any Notes entered are converted to message lines if the item is included on the order.
Job Quotes, Orders, Notes, Attachments and Audit Log
These tabs function the same as explained in Accounts. For more information, refer to Accounts.
Actions
The Actions allow you to update several opportunities at the same time.
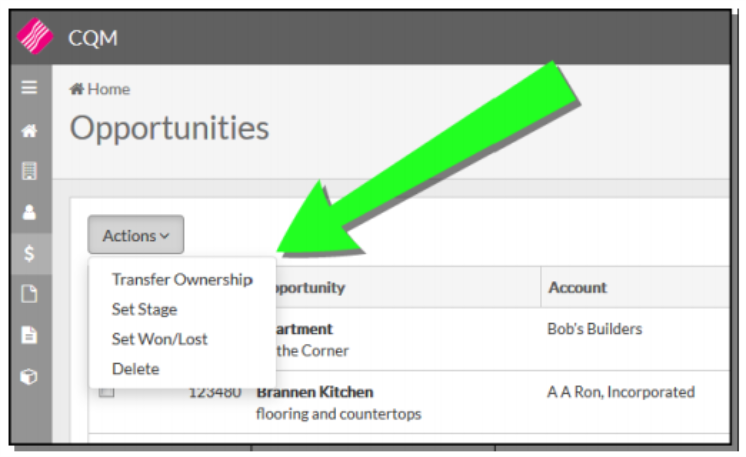
Select the opportunities and then click on an action.
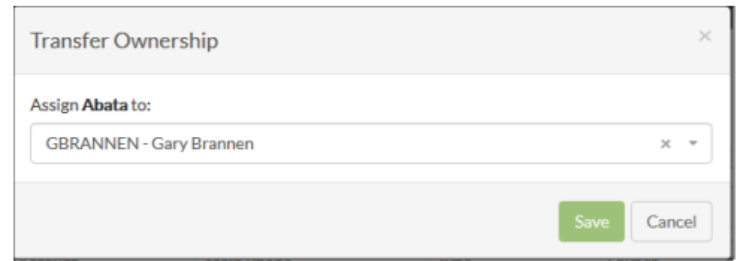
Transfer Ownership - This functionality allows a user to update the owner assigned to an opportunity from within a single contact view without entering into edit mode.
Set State - Allows you to update the status of the Opportunities.
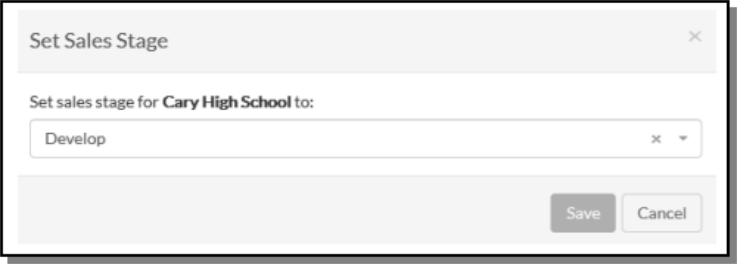
- Multiple Opportunities can be updated.
- The entries in the drop down list are created in the Admin Panel.
- Sales Stage is linked to Probability; in the admin panel the user will enter a Sales Stage value and link it to a Probability (%).
Set Won/Lost - This one of the few places in CQM where the text cannot be changed. Won and Lost are your options.
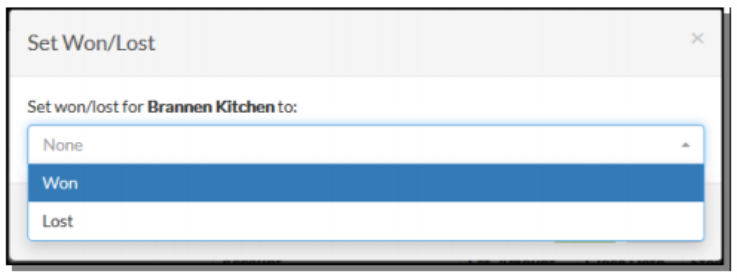
Delete - This action can only be performed on Opportunities that do not contain Job Quotes.
Job Quotes
Select the Job Quotes icon from the left hand navigation frame. A listing of all the existing job quotes appears.
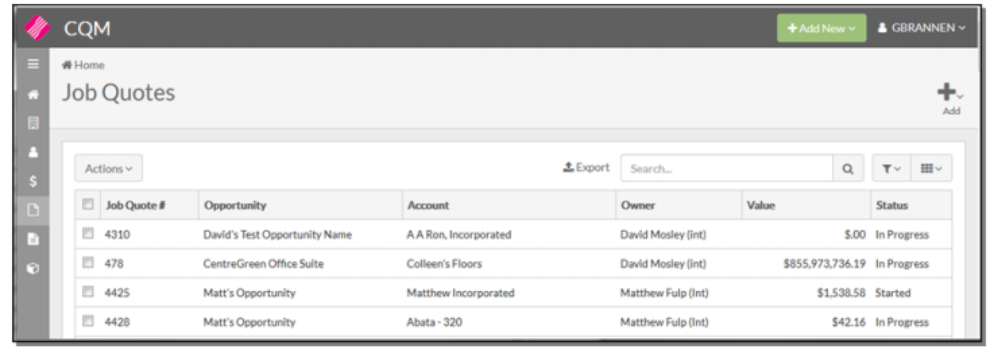
To add a new entry, click Add New in the upper right hand corner and select Job Quote.

The New Job Quote window appears. Enter the information as necessary.
Use the Opportunity drop down menu to select an opportunity associated with the job quote. When an opportunity is selected, its corresponding values populate the window.
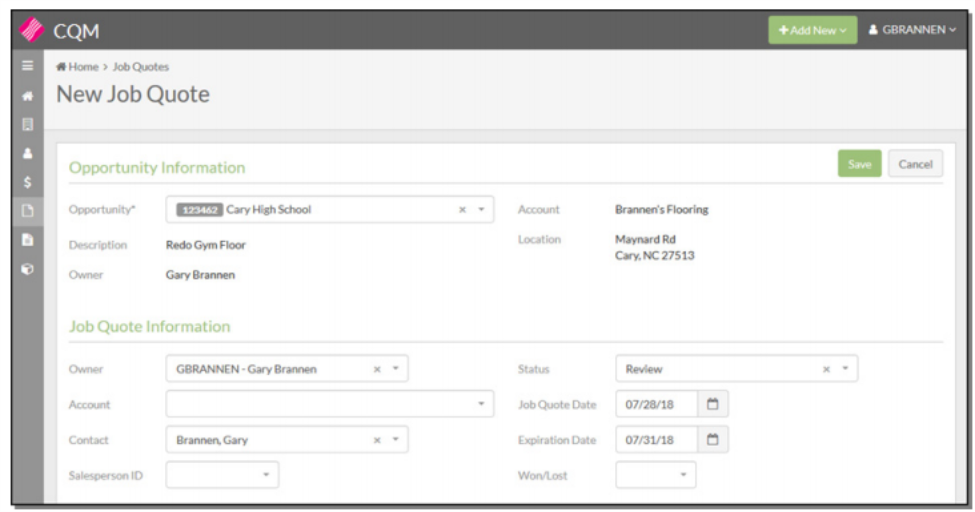
- Owner - Shows the owner of the quote.
- Contact - The dropdown only contains contacts assigned to the select Job Quote Account.
- Salesperson ID - This entry overrides the salesperson on the order; which is defaulted in from the account’s Billto File.
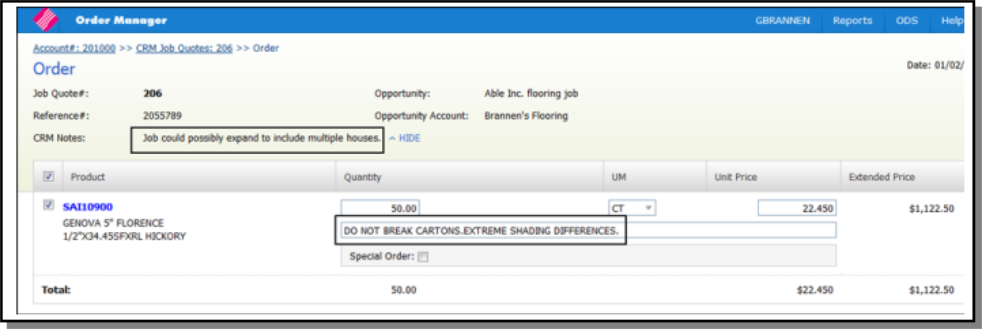
Notes entered into the CQM job quote.....
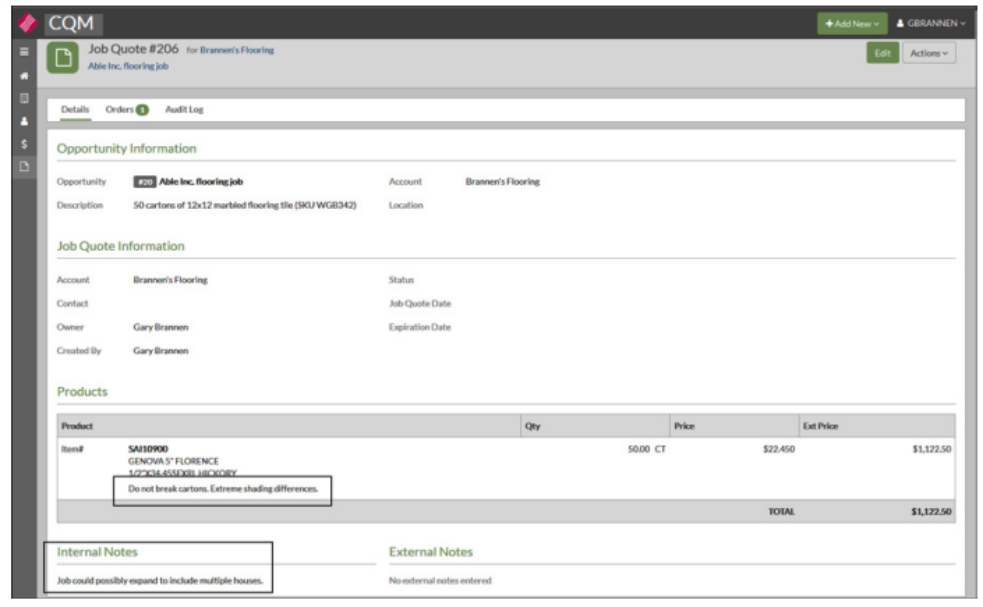
....will display in Navigator Order Entry.
Click Save to create the Job Quote.
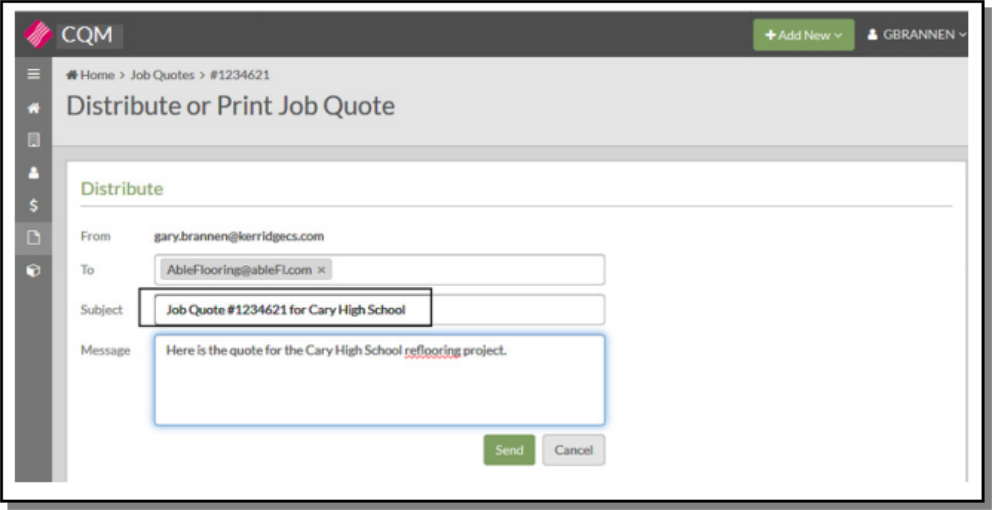
- Click Distribute to view the job quote in a preview screen and distribute it via email.
- Click Copy to create a new Job Quote with all the same values except the Account and Contact information. Those will need to be reentered on the new quote.
Actions
The Actions allow you to update several Job Quotes at the same time.
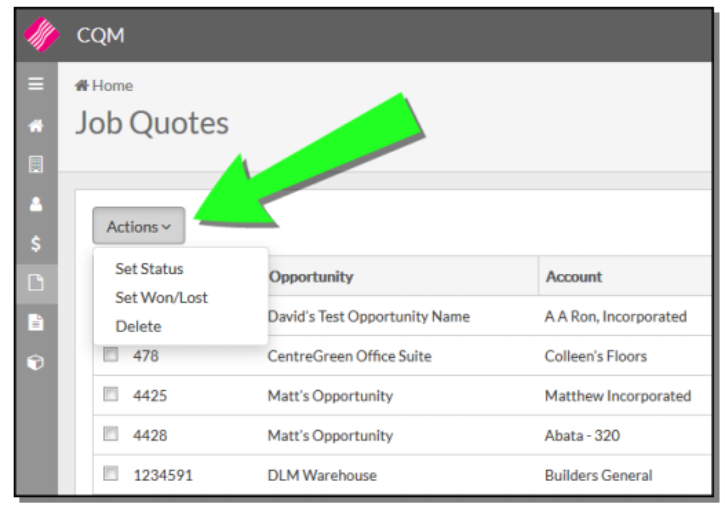
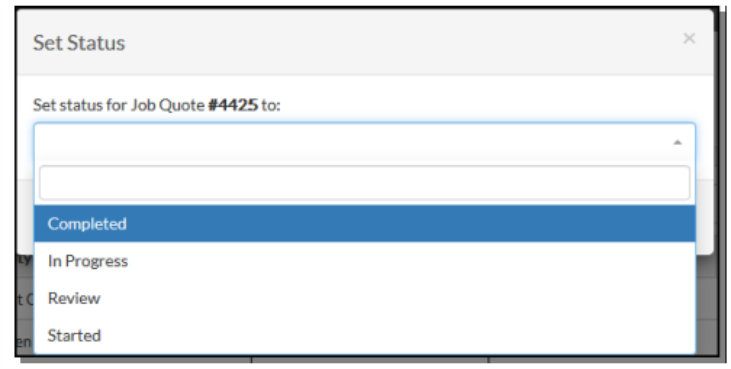
Set Status- Allows you to update the status of the Quote.
Orders
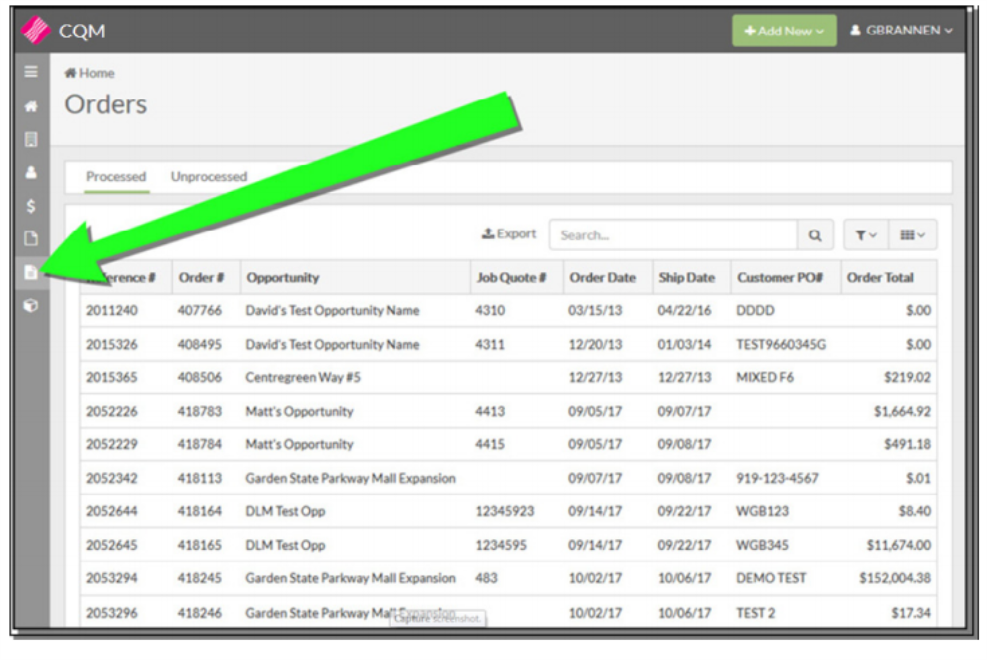
The Orders Window displays the orders created from Opportunities and Quotes.
Product View
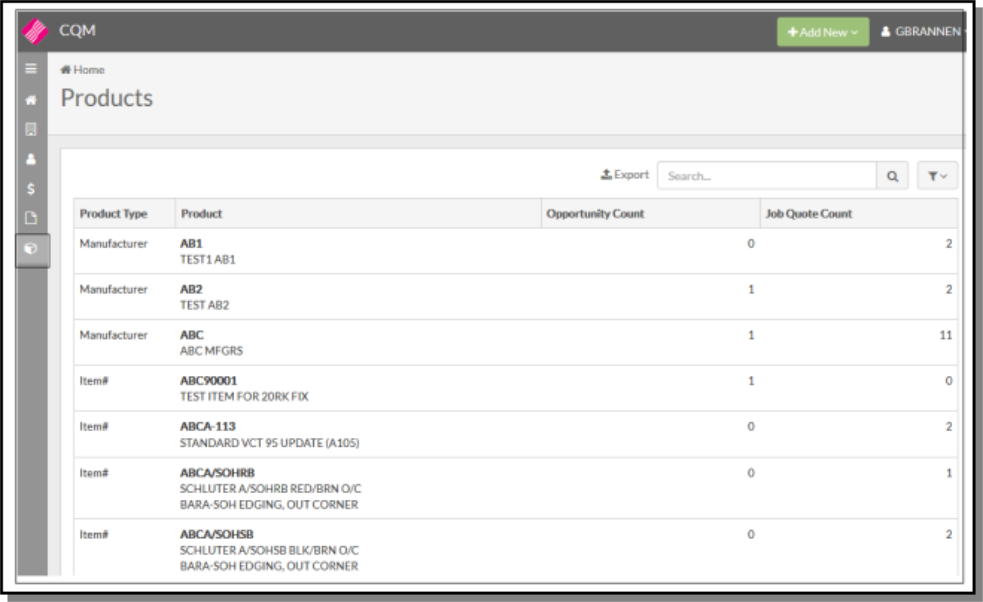
This view shows all the products that have been assigned to open Job Quotes and Opportunities.
Use can use the filter icon, in the right hand corner, to narrow the display as needed.
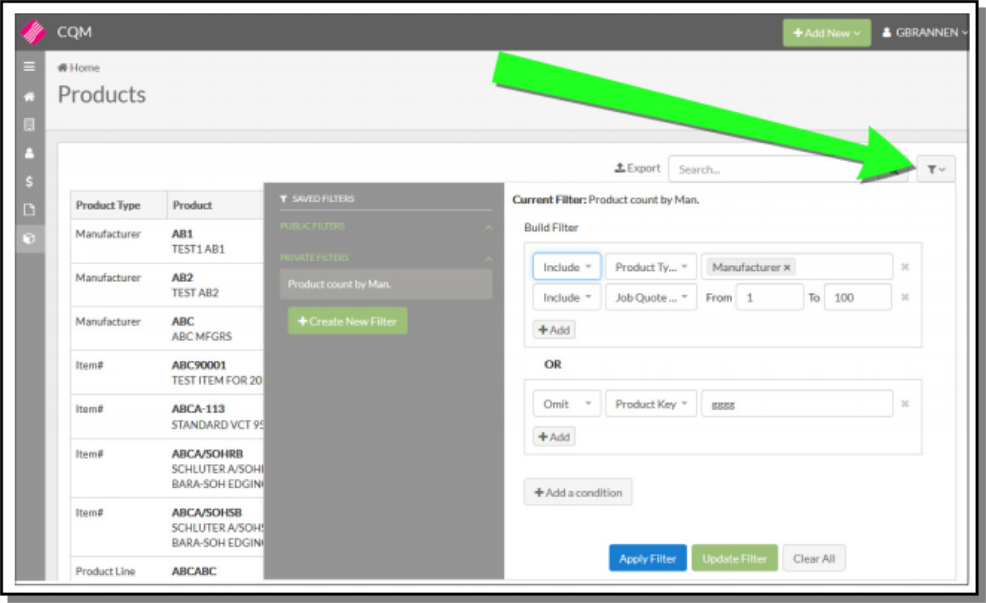
The new filter can be saved as Private or Public.

